Horseshoe BayHwy 1 ramp at Horseshoe Bay, looking east.Cross CreekHwy 1, at Cross Creek/15th St exit in West Vancouver, looking east.Hwy 1 at Hadden Drive Ramp - WHwy 1 at Hadden Drive ramp for Taylor Way, looking west.Hwy 1 at Hadden Drive Ramp - EHwy 1 at Hadden Drive ramp for Taylor Way, looking east.
Westview - NHwy 1 (Upper Levels Highway) at Westview Dr. looking north.Westview - WHwy 1 (Upper Levels Highway) at Westview Dr. looking westWestview - EHwy 1 (Upper Levels Highway) at Westview Dr. looking eastWestview - SHwy 1 (Upper Levels Highway) at Westview Dr. looking south.
Lonsdale - NHwy 1 (Upper Levels Highway) at Lonsdale Ave, looking north.Lonsdale - WHwy 1 (Upper Levels Highway) at Lonsdale Ave, looking west.Lonsdale - EHwy 1 (Upper Levels Highway) at Lonsdale Ave, looking east.Lonsdale - SHwy 1 (Upper Levels Highway) at Lonsdale Ave, looking south.Lynn Valley Rd - WHwy 1, near Lynn Valley Rd onramp, looking west.elevation: 128 metresLynn Valley Rd - EHwy 1, near Lynn Valley Rd onramp, looking east. (elevation: 128 metres)
Highway 1 - Ironworkers Memorial Bridge to Port Mann
Mountain Highway - NHwy 1 at the Mountain Highway exit, looking north.Mountain Highway - SHwy 1 at the Mountain Highway exit, looking south.Ironworkers northend approach - NHwy 1, northend of Ironworkers Memorial Bridge at Fern Street northbound.Ironworkers northend approach - SHwy 1, northend of Ironworkers Memorial Bridge at Fern Street, looking southbound.
Ironworkers northend - NHwy 1, north end of Ironworkers Memorial Bridge, looking north.Ironworkers northend - SHwy 1, north end of Ironworkers Memorial Bridge, looking south.Ironworkers midspanIronworkers Memorial Bridge, mid-span, looking south.Ironworkers southend westboundIronworkers Memorial Bridge, south end, looking north.Ironworkers southend eastboundHwy 1, south end of Ironworkers Memorial Bridge, looking eastbound toward the Cassiar Tunnel.
(elevation: 50 metres)Cassiar TunnelCassiar Tunnel - South Portal looking south on Hwy 1.Douglas Rd - WHwy 1 at Douglas Rd overpass, looking west.Douglas Rd - EHwy 1 at Douglas Rd overpass, looking east.Kensington - WHwy 1 at Kensington Ave, looking west.Kensington - EHwy 1 at Kensington Ave, looking east.BrunetteHwy 1 in Coquitlam, west of the Brunette Ave overpass, looking east.CoquitlamHwy 1 in Coquitlam, east of the Brunette Ave overpass, looking west.Port Mann Bridge - WHwy 1 at Port Mann Bridge, looking westbound.Port Mann Bridge - EHwy 1 at Port Mann Bridge, looking eastbound.
Highway 1 - Fraser Valley
Hwy 1 at 176th Street - NHwy 1 at 176th Street overpass, looking north.Hwy 1 at 176th Street - WHwy 1 at 176th Street overpass, looking west.Hwy 1 at 176th Street - EHwy 1 at 176th Street overpass, looking east.Hwy 1 at 176th Street - SHwy 1 at 176th Street overpass, looking south.
Hwy 1 at 232nd St - NHwy 1 westbound on-ramp from 232nd St, looking north.Hwy 1 at 232nd St - WHwy 1 at 232nd St. overpass, looking west.Hwy 1 at 232nd St - EHwy 1, at 232nd Street Overpass, looking east.Hwy 1 at 232nd St - SHwy 1 eastbound on-ramp from 232nd St, looking south.
Hwy 1 at 264th St - NHwy 1 off-ramp to 264th Street, looking north.Hwy 1 at 264th St - WHwy 1 at 264th St, looking west.Hwy 1 at 264th St - EHwy 1 at 264th St, looking east.Hwy 1 at 264th St - SHwy 1 on-ramp from 264th Street, looking south.
Bradner RdHwy 1, west of Abbotsford near Bradner Road, looking east.Bradner Rd - WHwy 1, west of Abbotsford near Bradner Road, looking west.Bradner Rd - EHwy 1, eastbound west of Abbotsford near Bradner Road, looking east. Mt Lehman - NHwy 1 at Mt. Lehman Rd, looking north.
Mt Lehman - WHwy 1 at Mt. Lehman Rd, looking west.Mt Lehman - EHwy 1 at Mt. Lehman Rd, looking east.Mt Lehman - SHwy 1 at Mt. Lehman Rd, looking south.Clearbrook - NHwy 1 at Clearbrook Rd, looking north.
Clearbrook - WHwy 1 at Clearbrook Rd, looking west.Clearbrook - EHwy 1 at Clearbrook Rd, looking east.Clearbrook - SHwy 1 at Clearbrook Rd, looking south.McCallum Road - WHwy 1 at McCallum Road overpass, looking west.
McCallum Road - EHwy 1 at McCallum Rd overpass, looking east.McCallum Rd Roundabout NorthboundMcCallum Rd roundabout, looking north.McCallum Rd Roundabout SouthboundMcCallum Rd roundabout, looking south.Sumas Way - NHwy 1 at Hwy 11 (Sumas Way) in Abbotsford, looking north.
Hwy 1 at Hwy 11 (Sumas Way) in Abbotsford, looking west.Sumas Way - EHwy 1 at Hwy 11 (Sumas Way) in Abbotsford, looking east.Sumas Way - SHwy 1 at Hwy 11 (Sumas Way) in Abbotsford, looking south.Cole Road - WHwy 1 at Cole Road Rest Area, looking west.
Cole Road - EHwy 1 at Cole Road Rest Area, looking east.Evans Road - NHwy 1 at Evans Road overpass near Chilliwack, looking north.Evans Road - WHwy 1 at Evans Road overpass near Chilliwack, looking west.Evans Road - EHwy 1 at Evans Road overpass near Chilliwack, looking east.
Evans Road - SHwy 1 at Evans Road overpass near Chilliwack, looking south.Chilliwack LakeChilliwack Lake Rd, at Paulsen Rd. About 42 km east of Chilliwack, looking east.Prest Rd - NHwy 1 at Prest Rd, Chilliwack, looking north.Prest Rd - WHwy 1 at Prest Rd, Chilliwack, looking west.
Prest Rd - EHwy 1 at Prest Rd, Chilliwack, looking east.Prest Rd - SHwy 1 at Prest Rd, Chilliwack, looking south.Annis Rd - NHwy 1 at Annis Rd, looking north.Annis Rd - WHwy 1 at Annis Rd, looking west.
Annis Rd - EHwy 1 at Annis Rd, looking east.Annis Rd - SHwy 1 at Annis Rd, looking south.Bridal Falls - WHwy 1 near Bridal Falls, looking west. Bridal Falls - EHwy 1 near Bridal Falls, looking east.
Herrling Island - WHwy 1, near Herrling Island, looking west.Herrling Island - EHwy 1, near Herrling Island, looking east.Herrling Island Overpass - NHwy 1 at Herrling Island overpass, looking north.Herrling Island Overpass - WHwy 1 at Herrling Island overpass westbound, looking west.
Herrling Island Overpass - EHwy 1 at Herrling Island overpass, westbound looking east.Herrling Island Overpass - SHwy 1 at Herrling Island overpass, looking south.Hunter CreekHwy 1 at Hunter Creek, looking east.
Highway 7 - Lougheed Highway
Lougheed at Kennedy RdHwy 7 (Lougheed Hwy) at Kennedy Road, looking northwest towards Pitt River Bridge.Pitt MeadowsHwy 7 (Lougheed Hwy) at Kennedy Rd, zoomed southeast, towards Pitt Meadows.Lougheed HwyHwy 7 (Lougheed Hwy) at Kennedy Road, looking southeast.Lougheed at Harris Rd - NHwy 7 (Lougheed Hwy) at Harris Road, looking north.
Lougheed at Harris Rd - WHwy 7 (Lougheed Hwy) at Harris Road, looking west.Lougheed at Harris Rd - EHwy 7 (Lougheed Hwy) at Harris Road, looking east.Lougheed at Harris Rd - SHwy 7 (Lougheed Hwy) at Harris Road, looking south.Lougheed at Dewdney Trunk Rd - NLougheed Hwy looking north onto Dewdney Trunk Rd.
Lougheed at Dewdney Trunk Rd - WLougheed Hwy looking west.Lougheed at Dewdney Trunk Rd - ELougheed Highway looking east.Lougheed at Maple Meadows Way - SLougheed Hwy looking south onto Maple Meadows Way.Albion - NHwy 7 (Lougheed Hwy) at 240th St, looking north along 240th St.
Albion - WHwy 7 (Lougheed Hwy) at 240th St, looking west along Hwy 7.Albion - EHwy 7 (Lougheed Hwy) at 240th St, looking east along Hwy 7.Albion - SHwy 7 (Lougheed Hwy) at 240th St, looking south along 240th St.Silverdale - NHwy 7 (Lougheed Hwy) at Hayward St in Mission, looking north-east along Hayward St.
Silverdale - WHwy 7 (Lougheed Hwy) at Hayward St in Mission, looking north-west along Hwy 7.Silverdale - EHwy 7 (Lougheed Hwy) at Hayward St in Mission, looking south-east along Hwy 7.Silverdale - SHwy 7 (Lougheed Hwy) at Hayward St in Mission, looking south-west along Hayward St.Nelson St - WLougheed Hwy (Hwy 7) at Nelson St in Mission, looking west.
Nelson St - ELougheed Hwy (Hwy 7) at Nelson St in Mission, looking east.Mission - NHwy 7 at Hwy 11 approaching Mission, looking north.Mission - WHwy 7 at Hwy 11 approaching Mission, looking west.Mission - EHwy 7 at Hwy 11 approaching Mission, looking east.
Mission - SHwy 7 at Hwy 11 approaching Mission, looking south.Deroche - WHwy 7 at Deroche Rd and Nicomen Rd railway crossing, looking west.Deroche - EHwy 7 at Deroche Rd and Nicomen Rd railway crossing, looking east.Highlands BlvdHwy 7 (Lougheed Hwy) at Highlands Blvd, approximately 3 km east of Harrison Mills, looking east.
AgassizHwy 7 at Hwy 9 (Evergreen Drive) in Agassiz, looking east.HopeHwy 1 at Hwy 7 near Hope, looking west.Devil Lake - WHwy 7, about 2 km west of Hope, looking west.Devil Lake - EHwy 7, about 2 km west of Hope, looking east.
Highway 7B - Mary Hill Bypass
Mary Hill Bypass at Shaughnessy - WHwy 7B/Mary Hill Bypass at Shaughnessy St looking west.Mary Hill Bypass at Shaughnessy - EHwy 7B/Mary Hill Bypass at Shaughnessy St looking east.Pitt River Rd - NHwy 7B (Mary Hill Bypass), at Pitt River Rd, looking north.Pitt River Rd - WHwy 7B (Mary Hill Bypass), at Pitt River Rd, looking west.
Pitt River Rd - EHwy 7B (Mary Hill Bypass), at Pitt River Rd, looking east.pitt River Rd - SHwy 7B (Mary Hill Bypass), at Pitt River Rd, looking south.Mary Hill Bypass - NEHwy 7B, on Mary Hill, looking northeast.Mary Hill Bypass - SWHwy 7B, on Mary Hill, looking southwest.
Highway 9
Agassiz-Rosedale Bridge - NHwy 9, north end of Agassiz-Rosedale Bridge, looking north.Agassiz-Rosedale Bridge - SHwy 9, north end of Agassiz-Rosedale Bridge, looking south.Rosedale Overhead - NHwy 9, at the south end of Rosedale Overhead, looking north.Rosedale Overhead - SHwy 9, at the south end of Rosedale Overhead, looking south.
Highway 10
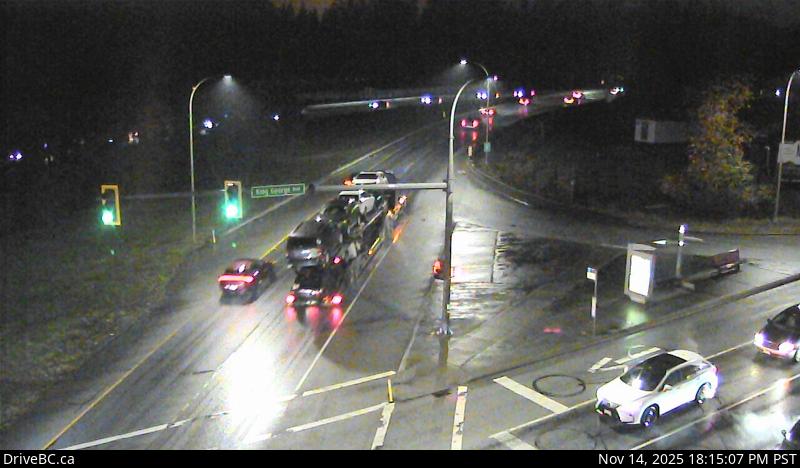
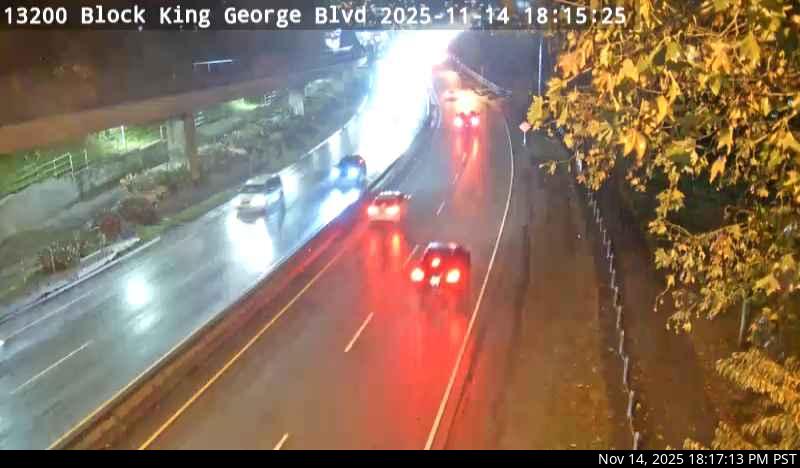
Hwy 10 at King George Blvd - WHwy 10 at King George Blvd, looking west on Hwy 10.Hwy 10 at King George Blvd - EHwy 10 at King George Blvd, looking east on Hwy 10.Hwy 10 at 152nd St - NHwy 10 at 152nd Street, looking north on 152nd.Hwy 10 at 152nd St - WHwy 10 at 152nd Street, looking west on Hwy 10.
Hwy 10 at 152nd St - EHwy 10 at 152nd Street, looking east on Hwy 10.Hwy 10 at 152nd St - SHwy 10 at 152nd Street, looking south on 152nd.Hwy 10 at 192nd St - NHwy 10, at 192nd St., looking northHwy 10 at 192nd St - WHwy 10, at 192nd St., looking west.
Hwy 10 at 192nd St - EHwy 10, at 192nd St., looking east.Hwy 10 at 192nd St - SHwy 10, at 192nd St., looking south.Hwy 10 at Fraser Hwy - NWHwy 10 at Fraser Hwy in Langley, looking northwest.Hwy 10 at Fraser Hwy - NEHwy 10 at Fraser Hwy in Langley, looking northwest.
Hwy 10 at Fraser Hwy - SWHwy 10 at Fraser Hwy in Langley, looking southwest.Hwy 10 at Fraser Hwy - SEHwy 10 at Fraser Hwy in Langley, looking southeast.Hwy 10 at 200th St - NHwy 10 at 200th St in Langley, looking north.Hwy 10 at 200th St - WHwy 10 at 200th St in Langley, looking west.
Hwy 10 at 200th St - EHwy 10 at 200th St in Langley, looking east.Hwy 10 at 200th St - SHwy 10 at 200th St in Langley, looking south.
Highway 11 - Abbotsford Mission Hwy
Hwy 11 at Harris Rd - NHwy 11 at Harris Rd, looking northHwy 11 at Harris Rd - WHwy 11 at Harris Rd, looking west.Hwy 11 at Harris Rd - EHwy 11 at Harris Rd, looking eastHwy 11 at Harris Rd - SHwy 11 at Harris Rd, looking south.
Hwy 11 at Clayburn Rd - NHwy 11 in Abbotsford at Clayburn Rd, looking north.Hwy 11 at Clayburn Rd - WHwy 11 in Abbotsford at Clayburn Rd, looking west.Hwy 11 at Clayburn Rd - EHwy 11 in Abbotsford at Clayburn Rd, looking east.Hwy 11 at Clayburn Rd - SHwy 11 in Abbotsford at Clayburn Rd, looking south.
Highway 15 - Surrey-Whiterock
Hwy 15 at Fraser Hwy - NHwy 15 at Fraser Hwy (1A) looking north on Hwy 15.Hwy 15 at Fraser Hwy - WHwy 15 at Fraser Hwy (1A) looking north-west on Fraser HwyHwy 15 at Fraser Hwy - EHwy 15 at Fraser Hwy (1A) looking south-east on Fraser HwyHwy 15 at Fraser Hwy - SHwy 15 at Fraser Hwy (1A) looking south on Hwy 15
Hwy 15 at Hwy 10 - NHwy 15 at Hwy 10, looking north on Hwy 15.Hwy 15 at Hwy 10 - WHwy 15 at Hwy 10, looking west on Hwy 15Hwy 15 at Hwy 10 - EHwy 15 at Hwy 10, looking east on Hwy 10Hwy 15 at Hwy 10 - SHwy 15 at Hwy 10, looking south on Hwy 15.
Hwy 15 at 16th Ave - NHwy 15 at 16th Ave, looking north.Hwy 15 at 16th Ave - WHwy 15 at 16th Ave - EHwy 15 at 16th Ave, looking east.Hwy 15 at 16th Ave - SHwy 15 at 16th Ave, looking south.
Highway 17
Deltaport Way - NHwy 17 (South Fraser Perimeter Rd) at Deltaport Way in South Delta, looking north.Deltaport Way - EHwy 17 (South Fraser Perimeter Rd) at Deltaport Way in South Delta, looking east.Deltaport Way - SHwy 17 (South Fraser Perimeter Rd) at Deltaport Way in South Delta, looking south.Salish Sea Dr - NHwy 17 at Salish Sea Drive (48th St), looking north.
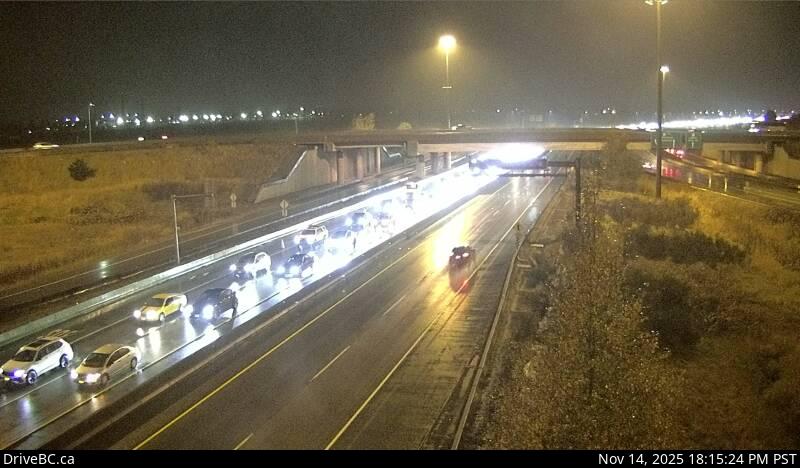
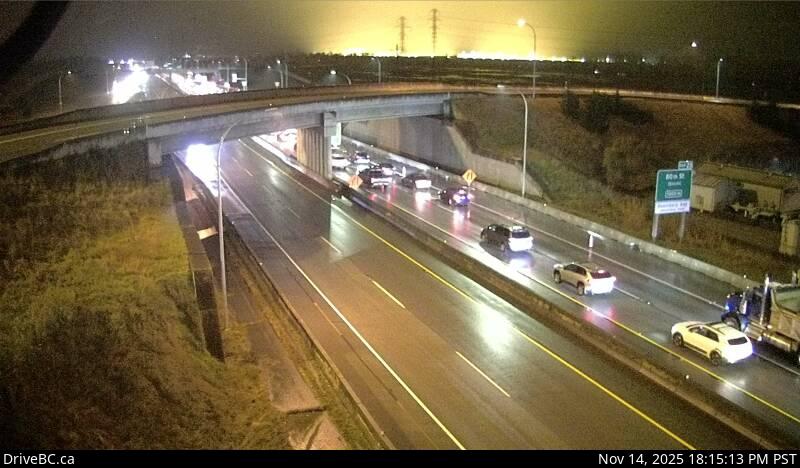
Salish Sea Dr - WHwy 17 at Salish Sea Drive (48th St), looking west.Salish Sea Dr - EHwy 17 at Salish Sea Drive (48th St), looking east.Hwy 17 at 52nd St - NHwy 17 at 52nd Street, looking north.Hwy 17 at 52nd St - WHwy 17 at 52nd Street, looking west.Hwy 17 at 52nd St - EHwy 17 at 52nd Street, looking east.Hwy 17 at 52nd St - SHwy 17 at 52nd Street, looking south.Hwy 17 at 56th St - NHwy 17 at 56th St., looking north.Hwy 17 at 56th St - WHwy 17 at 56th St., looking west.Hwy 17 at 56th St - EHwy 17 at 56th St., looking east.Hwy 17 at 56th St - SHwy 17 at 56th St., looking south.Hwy 17 at 80th St - NHwy 17 (South Fraser Perimeter Rd) at 80th Street, looking north.Hwy 17 at 80th St - WHwy 17 (South Fraser Perimeter Rd) at 80th Street, looking west.
Hwy 17 at 80th St - EHwy 17 (South Fraser Perimeter Rd) at 80th Street, looking east.Hwy 17 at Hwy 91 Connector - NHwy 17 (South Fraser Perimeter Rd), at Hwy 91 Connector, looking north.Hwy 17 at Hwy 91 Connector - WHwy 17 (South Fraser Perimeter Rd), at Hwy 91 Connector, looking west.Hwy 17 at Hwy 91 Connector - EHwy 17 (South Fraser Perimeter Rd), at Hwy 91 Connector, looking east.
Hwy 17 at Hwy 91 Connector - SHwy 17 (South Fraser Perimeter Rd), at Hwy 91 Connector, looking south.Tannery Rd Overpass - NHwy 17 (South Fraser Perimeter Rd) at Tannery Rd Overpass in Surrey, looking north.Tannery Rd Overpass - WHwy 17 (South Fraser Perimeter Rd) at Tannery Rd Overpass in Surrey, looking west.Tannery Rd Overpass - EHwy 17 (South Fraser Perimeter Rd) at Tannery Rd Overpass in Surrey, looking east.
Tannery Rd Overpass - SHwy 17 (South Fraser Perimeter Rd) at Tannery Rd Overpass in Surrey, looking south.Bridgeview Dr - WHwy 17 (South Fraser Perimeter Rd) at Bridgeview Dr, looking west.Bridgeview Dr - EHwy 17 (South Fraser Perimeter Rd) at Bridgeview Dr, looking east.Bridgeview Dr - SHwy 17 (South Fraser Perimeter Rd) at Bridgeview Dr, looking south.
104th Ave at Hwy 17 westbound104th Avenue and Hwy 17, looking westbound. Hwy 17 at 104th Ave eastboundHwy 17 at 104th Avenue eastbound along Hwy 17.104th Ave at Hwy 17 eastbound104th Avenue at Hwy 17 looking east.Hwy 17 at 104th Ave southboundHwy 17 at 104th Avenue looking southbound.
Delta - NHwy 17A, about 0.5 km south of Hwy 10 intersection in Delta, looking north.Delta - SHwy 17A, about 0.5 km south of Hwy 10 intersection in Delta, looking south.
Highway 91A - New Westminster / Queensborough
Hwy 91A at Boundary Rd - WHwy 91A at Boundary Road, looking west.Hwy 91A at Boundary Rd - EHwy 91A at Boundary Road, looking east.Hwy 91A at Queensborough Bridge - SHwy 91A, north end of Queensborough Bridge, looking south.Hwy 91A at Queensborough Bridge - EHwy 91A, north end of Queensborough Bridge, looking east.
Hwy 91A at Howes St - WHwy 91A at Gifford Street, looking west.Hwy 91A at Howes St - EHwy 91A at Gifford Street, looking east. Queensborough ConnectorHwy 91A, at Hwy 91 interchange to Queensborough Connector, looking north.
Highway 0 - Knight Street
Knight Street Bridge northend - NNorth end of Knight Street Bridge, looking north.Knight Street Bridge northend - SNorth end of Knight Street Bridge, looking south.Knight Street Bridge southend - NSouth end of Knight Street Bridge, looking north.Knight Street Bridge southend - SSouth end of Knight Street Bridge, looking south.
Highway 91 - Alex Fraser Bridge
Alex Fraser Bridge SouthboundHwy 91, southbound approach to Alex Fraser Bridge, looking south.Annacis Channel Bridge ApproachHwy 91 at Hwy 91A interchange, looking east to Annacis Channel Bridge approach.Annacis Island - NHwy 91 on Annacis Island at the Cliveden Ave Overpass, looking north.Annacis Island - WHwy 91 on Annacis Island at the Cliveden Ave Overpass, looking south.
Annacis Island - EHwy 91 on Annacis Island at the Cliveden Ave Overpass, looking east.Annacis Island - SHwy 91 on Annacis Island at the Cliveden Ave Overpass, looking south.Alex Fraser Bridge - NAlex Fraser Bridge, mid-span, looking north.Alex Fraser Bridge - SAlex Fraser Bridge, mid-span, looking south.
Hwy 91 Connector at Nordel Way - NHwy 91 Connector at Nordel Way, looking north.Hwy 91 Connector at Nordel Way - WHwy 91 Connector at Nordel Way, looking west.Hwy 91 Connector at Nordel Way - EHwy 91 Connector at Nordel Way, looking east.
Highway 91 - East - West Connector
Hwy 91 East-West Connector - WHwy 91 at Hwy 91A Interchange, looking west on the East-West Connector.Hwy 91 at No.6 Rd - WHwy 91 (East-West Connector) at No.6 Road, looking west.Hwy 91 at No.6 Rd - EHwy 91 (East-West Connector) at No.6 Road, looking east.Hwy 91 at No.8 Rd - WHwy 91 at No.8 Road on East-West Connector, looking west.
Hwy 91 at No.8 Road on East-West Connector, looking east.Hwy 91 at Fraserwood - WHwy 91 at Fraserwood Way, on the East-West Connector, looking west.Hwy 91 at Fraserwood - EHwy 91 at Fraserwood Way, on the East-West Connector, looking east.
Highway 91 - Delta
Hwy 91 at 72nd Ave - NHwy 91 at 72nd Ave. in Delta, looking north.Hwy 91 at 72nd Ave - EHwy 91 at 72nd Ave in Delta, looking east on 72nd.Hwy 91 at 72nd Ave - SHwy 91 at 72nd Ave. in Delta, looking south.
Highway 99 - Whistler to Lillooet
Duffey LakeHwy 99 (Duffey Lake Rd) at Cayoosh summit, looking east.Pemberton - NHwy 99 at Portage Rd in Pemberton, looking north.Pemberton - WHwy 99 at Portage Rd in Pemberton, looking west.Pemberton - EHwy 99 at Portage Rd in Pemberton, looking east.
Pemberton - SHwy 99 at Portage Rd in Pemberton, looking south.WedgeHwy 99, about 13 km north of Whistler at Riverside Drive, looking north.Alpine Way - NHwy 99 at Alpine Way, looking north.Alpine Way - WHwy 99 at Alpine Way, looking west.
Alpine Way - EHwy 99 at Alpine Way, looking east.Alpine Way - SHwy 99 at Alpine Way, looking south.Lorimer Rd - NHwy 99, in Whistler at Lorimer Rd, looking north.Lorimer Rd - WHwy 99, in Whistler at Lorimer Rd, looking west.
Lorimer Rd - EHwy 99, in Whistler at Lorimer Rd, looking east.Lorimer Rd - SHwy 99, in Whistler at Lorimer Rd, looking southWhistler Village Gate - NHwy 99, in Whistler at Village Gate Blvd, looking north.Whistler Village Gate - EHwy 99, in Whistler at looking east on Village Gate Blvd.
Whistler Village Gate - SHwy 99, in Whistler at Village Gate Blvd, looking south.Lake Placid - NHwy 99, in Whistler at Lake Placid Rd, looking north.Lake Placid - WHwy 99, in Whistler at Lake Placid Rd, looking west.Lake Placid - EHwy 99, in Whistler at Lake Placid Rd, looking east.
Lake Placid - SHwy 99, in Whistler at Lake Placid Rd, looking south.
Highway 99 - Sea-to-Sky Highway
Function Junction - NHwy 99 at Cheakamus Lake Rd & Alpha Lake Rd, 5 km south of Whistler, looking north.Function Junction - WHwy 99 at Cheakamus Lake Rd & Alpha Lake Rd, 5 km south of Whistler, looking west.Function Junction - EHwy 99 at Cheakamus Lake Rd & Alpha Lake Rd, 5 km south of Whistler, looking east.Function Junction - SHwy 99 at Cheakamus Lake Rd & Alpha Lake Rd, 5 km south of Whistler, looking south.
Brew Creek - NHwy 99, near Brew Creek Forest Service Rd, about 17 km southwest of Whistler, looking north.
Brew Creek - SHwy 99, near Brew Creek Forest Service Rd, about 17 KM southwest of Whistler, looking south.
Daisy Lake - NHwy 99, at Daisy Lake Rd about 26 km south of Whistler, looking north.Daisy Lake - SHwy 99, at Daisy Lake Rd about 26 km south of Whistler, looking south.
Culliton - NHwy 99, about 24 km north of Squamish, looking north.Culliton - SHwy 99, about 24 km north of Squamish, looking south.Alice Lake - NHwy 99 at Squamish Valley Rd, about 10 km north of Squamish, looking north.Alice Lake - SHwy 99 at Squamish Valley Rd, about 10 km north of Squamish, looking south.
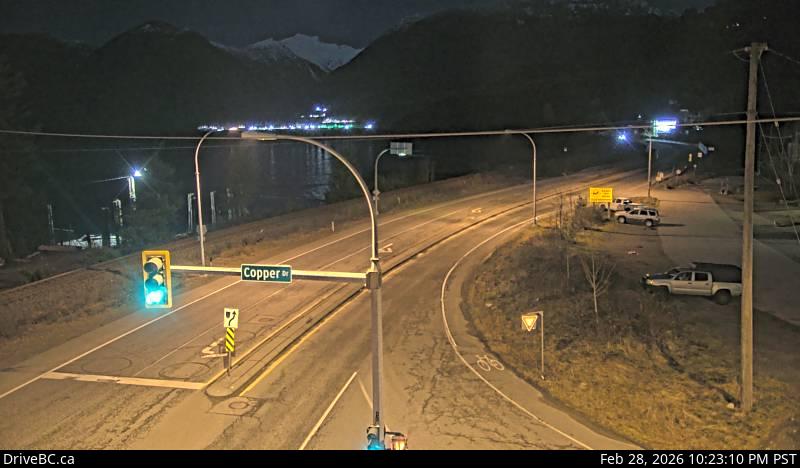
Britannia - NHwy 99 in Britannia Beach at Copper Drive, looking north.Britannia - SHwy 99 in Britannia Beach at Copper Drive, looking south.Furry CreekHwy 99, about 12km south of Squamish, looking south.Lions Bay - NHwy 99, in Lions Bay looking north.
Lions Bay - SHwy 99, in Lions Bay looking south.
Highway 99 - Lions Gate Bridge & Marine Drive
Marine Dr.Taylor Way/Marine Drive intersection, looking east toward Lions Gate Bridge.Taylor WayTaylor Way at Marine Drive, looking north on Taylor Way.Lions Gate Bridge - North End 2North end of Lions Gate Bridge, looking north.Lions Gate Bridge - North End 1North end of Lions Gate Bridge, looking south.
Stanley park EntranceStanley Park Causeway at Stanley Park Entrance, looking south.Georgia St.Georgia St at Chilco, looking south.
Highway 99 - Oak Street Bridge - Richmond
Oak St. 70th - NOak Street at 70th Ave., north approach to Oak Street Bridge, looking north on Oak Street.
Oak St. 70th - SOak Street at 70th Ave., north approach to Oak Street Bridge, looking south to the bridge.
Hwy 99 at Cambie Rd - NHwy 99 at Cambie Rd in Richmond, looking north.Hwy 99 at Cambie Rd - SHwy 99 at Cambie Rd in Richmond, looking south.
Hwy 99 at Shell RoadHwy 99 at Shell Rd, approaching Oak St Bridge, looking north.Hwy 99 at Westminster Hwy - NHwy 99 at Westminster Hwy in Richmond, looking north.Hwy 99 at Westminster Hwy - SHwy 99 at Westminster Hwy in Richmond, looking south.
Highway 99 - George Massey Tunnel
Works YardHwy 99 at Delta Works Yard, looking north*.Hwy 17A OverpassHwy 99 from Hwy 17A overpass, looking north.Hwy 99 at Hwy 17A - River RdHwy 99 at Hwy 17A overpass, looking east to 62B/River Rd.Hwy 99 at Hwy 17A - NorthboundHwy 99, north of Hwy 17A overpass, looking north on Hwy 99 at northbound lanes.
Hwy 99 at Hwy 17A - SouthHwy 99, north of Hwy 17A overpass, looking south on Hwy 99 at northbound lanes.Hwy 99 at Hwy 17A - WestHwy 99 at Hwy 17A overpass, looking west to Hwy 17A.South ApproachHwy 99, north of Hwy 17A overpass, looking north.DeasHwy 99 from north of Hwy 17A overpass, looking north*.
StevestonHwy 99, looking north from Steveston interchange.BlundellLooking south between Blundell overpass and Steveston offramp.
Highway Highway 99 - Delta
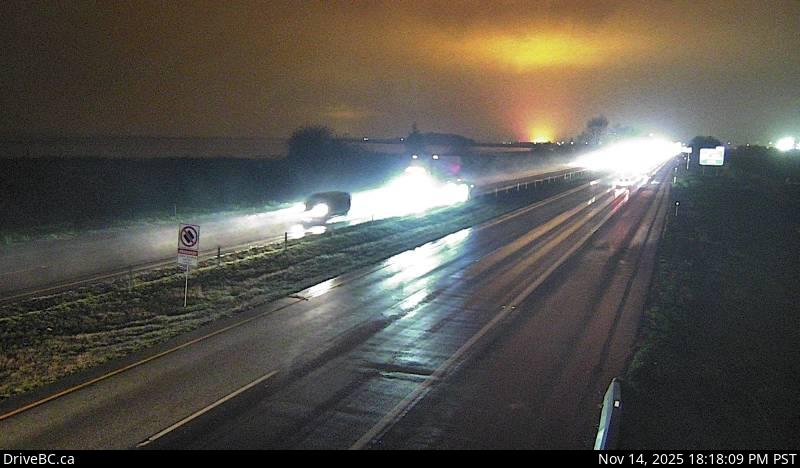
Hwy 99 at 80th St - WHwy 99 at 80th Street ramp, looking west.Hwy 99 at 80th St - EHwy 99 at 80th Street ramp, looking east.80th St at Ladner Trunk Rd80th Street at Ladner Trunk Rd, looking south.Hwy 99 at Hwy 17 - WHwy 99 at Hwy 17 in Delta, looking west.
Hwy 99 at Hwy 17 - EHwy 99 at Hwy 17 in Delta, looking east.
Highway 99 - Surrey - White Rock
Hwy 99 at Mud Bay - WHwy 99, near Hwy 91 around Mud Bay in Surrey, looking west on Hwy 99 northbound.Hwy 99 at Mud Bay - EHwy 99, near Hwy 91 around Mud Bay in Surrey, looking east on Hwy 99 southbound.Hwy 99 at King George Blvd - NHwy 99 at King George Blvd, looking north.Hwy 99 at King George Blvd - SHwy 99 at King George Blvd, looking south.
King George Blvd at Hwy 99 - WKing George Blvd at Hwy 99, looking west.King George Blvd at Hwy 99 - EKing George Blvd at Hwy 99, looking east.Hwy 99 - 32nd Ave Diversion - NHwy 99, north of 32nd Ave Diversion, looking north.Hwy 99 - 32nd Ave Diversion - SHwy 99, north of 32nd Ave Diversion, looking south.
Hwy 99 at 16th Ave - NHwy 99, at 16th Avenue, looking north.Hwy 99 at 16th Ave - WHwy 99, at 16th Avenue, looking west.Hwy 99 at 16th Ave - EHwy 99, at 16th Avenue, looking east.Hwy 99 at 16th Ave - SHwy 99, at 16th Avenue, looking south.
Highway 99A - King George Blvd
Pattullo Bridge Northend - SouthPattullo Bridge at north end, in New Westminster, looking south.Pattullo Bridge Southend - WestPattullo Bridge at the south end, in Surrey, looking west.Pattullo Bridge Southend - EastPattullo Bridge at south end, in Surrey, looking eastPattullo Bridge ApproachHwy 99A (King George Blvd) near 132nd St, looking west.
Highway 101 - Sunshine Coast
Powell RiverHwy 101 at Loubert Rd in Powell River on the Sunshine Coast, looking south.Earls CoveHwy 101 at Egmont Rd, south of Earls Cove on the Sunshine Coast, looking South.Secret CoveHwy 101 at Brooks Rd on the Sunshine Coast, looking south.Gibsons Bypass - NHwy 101, top of Gibsons Bypass at Stewart Rd, looking north.
Gibsons Bypass - EHwy 101, top of Gibsons Bypass at Stewart Rd, looking east.Gibsons Bypass - SHwy 101, top of Gibsons Bypass at Stewart Rd, looking south.